Aug 20, 2017 | Card - Thank You, Creating with Bundles, Gallery, Stamping Tips & Techniques |
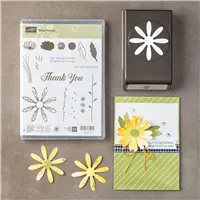
Welcome back! My last post featured a card using the Delightful Daisy designer series paper. Today I wanted to share the rest of the Delightful Daisy suite with you, with this card.

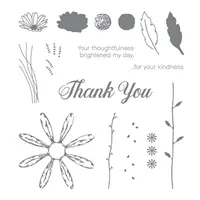
Creating with a suite of products makes crafting easier. All the products coordinate perfectly, which makes putting a project together seamless. Suites often contain stamps with a matching punch or die set, designer series paper, trims, and sometimes, embellishments. This particular suite, Delightful Daisy, contains the Daisy Delight stamp set and coordinating Daisy punch, Delightful Daisy designer series paper with matching cardstock, and ribbon. The best part about the coordinating stamp set and punch, is a discount when purchased together as a bundle, not only making crafting easy, but saving money as well!
Quick Tip: When planning projects, consider purchasing a coordinating suite of products. This helps save money while making crafting fast and easy!
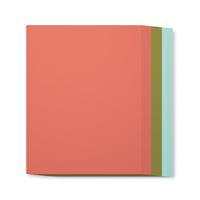
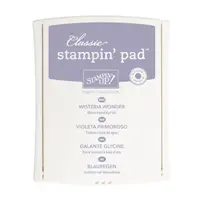
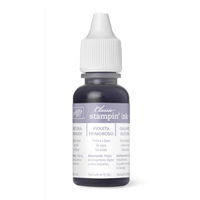
The color palate for this suite, which was also used on this card, includes:
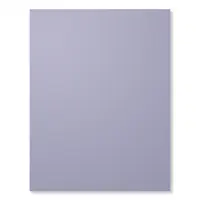
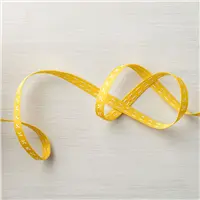
To recreate this card, cut a card base of Wisteria Wonder cardstock to 5 1/2" x 8 1/2" and score at 4 1/4". Than choose the designer series paper pattern (dsp) of your choice, and cut to 2 7/8" x 4 1/4". I chose to layer Calypso Coral cardstock under my dsp, which was cut to 3" x 4 1/4". Adhere the dsp onto the Calypso Coral cardstock layer. Tie a piece of Delightful Daisy double-stitched ribbon around the dsp layer, and adhere to cardbase. Stamp the sentiment from the Daisy Delight stamp set above the dsp layer in Wisteria Wonder ink. Than stamp 3 large daisies in the same ink, and punch with the Daisy punch. Stamp centers on each flower with Daffodil Delight ink. Adhere daisies to card front. I chose to use dimensionals on 2 of the daisies to add depth to my card. Trim parts of any daisy extending past your card edge. Color the daisy centers with Wink of Stella to finish the card off with a little shimmer.
When you shop for card making supplies, do you purchase suites? Stampin' Up! has 15 product suites in the current Annual catalog. Need a catalog? Contact me using the Contact Me link in my sidebar. I will be happy to send a catalog to you. In the meantime, click on any of the products below to go to my store and build your suite of products.
Thanks for stopping by!
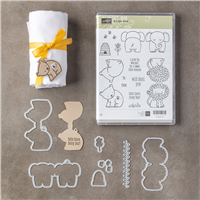
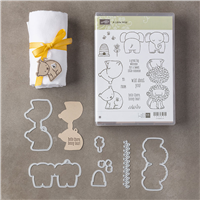
Aug 17, 2017 | Cards - All Occasions, Gallery |
Welcome back!

Today I am featuring a card using the very popular designer series paper pack, Delightful Daisy. It coordinates with the Daisy Delight stamp set and Daisy punch, however, today I have paired it with the adorable stamp set, Pieces & Patterns, which has this fun circle sentiment stamp.

Next time you you need a quick card, this is a good one to choose! I love when I find a great stand-alone dsp. One that carries a card. It makes it so easy to create something beautiful, which needs minimal fuss to look great! And although I am not a big flower crafter, this dsp is beautiful!
The colors for this card are simple:
To recreate this project, cut an Old Olive card base of 4 1/4" x 11", and score at 5 1/2". Than cut a piece of dsp to 3 3/4" x 5", and adhere to the card front. Stamp the sentiment in Daffodil Delight ink on Whisper White cardstock, and punch out with the 1 3/4" circle punch. Punch out one piece of Old Olive cardstock using the new Starburst punch, and adhere to the card front. This is one of my new favorite punches, and is a must-have! Fold a small piece of Double-Stitched Daffodil Delight ribbon in half, and adhere to the back of the sentiment circle, than adhere on top of the starburst using dimensionals. To finish it nicely, scatter a few Glitter Enamel Dots across the front, and it's done!
Hope you enjoyed this card! To make one of your own, pick up the supplies in my store by using the Shop Now tab in the sidebar, or by clicking on any of the items listed below.
But before you go, what is your favorite pack of designer series paper? I would love to know!
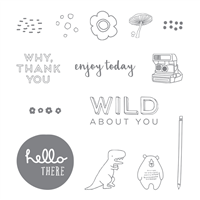
Jul 27, 2017 | Cards - Baby, Cards - Birthday, Creating with Bundles, Gallery, Shaker Cards, Stamping Tips & Techniques |
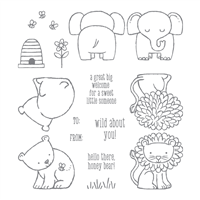
Hi Friends, I am back today with one last project using the A Little Wild bundle.

This bundle has been really fun to create with! Have you ever found a stamp set or bundle that you start making a specific project with, than you find yourself creating more and more with it, because it is so fun to work with? That's how I feel about this bundle! As you know from my last post, I am in love with the little bees! So this project was made specifically for those little guys, and of course, I had to make a bee hive with little bees inside! What better way to do that, than with a shaker card!

To create this card, cut the following pieces of cardstock:
- 4 1/4" x 11" piece of Daffodil Delight cardstock, scored at 5 1/2"
- 4" x 5 1/4" piece of Basic Black cardstock
- 3 7/8" x 5 1/8" piece of Whisper White cardstock
- 2" x 2" piece of Whisper White cardstock
- 1 1/4" x 2 1/2" piece of Daffodil Delight cardstock
- 1 1/2" x 2 1/2" piece of Window Sheet
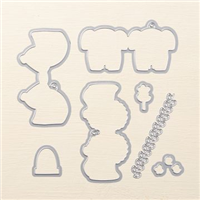
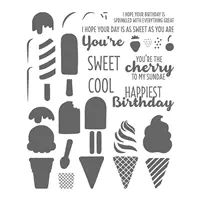
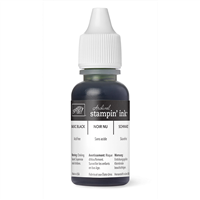
Stamp the bee hive randomly across the front of the Whisper White layer in Daffodil Delight ink. Stamp 3 sets of bees on the 2" Whisper White piece in Archival Black ink, than color them with the Daffodil Delight watercolor pencil. Using the bee hive die from the Little Loves framelits set, die cut a hive just off center near the bottom of the Whisper White layer, and use the bee die to cut out the bees. Now, make the shaker. On the back side of the Whisper White layer, adhere the piece of window sheet using Fast Fuse adhesive. Than, applying Foam Adhesive Strips to the window sheet, outline the bee hive. Place some bees (face down) inside the hive. I also added some black and irridescent sequins from the Metallics Sequin Assortment. Now, you can choose to apply the Basic Black layer over the top, but I cheat, and add a second layer of window sheet over this area. I find it is easier to line up my layers, so this is what I did. I than adhered the front layer to the Basic Black layer. Next, tie a double piece of Basic Black solid twine around the center, and adhered this piece, with dimensionals, to the Daffodil Delight card base. For the sentiment, I used the Cool Treats stamp set because the word Sweet was perfect! This was also stamped in Archival Black ink. For the right edge of the sentiment strip, I lined up the bee hive die along the edge of the strip, and die cut an edge to fit along the shaker window. Punch the other end with the Banner Triple Punch, and adhere along the bottom of card, lining up with the hive. Embellish as you choose with the little bees.
The colors I choose for this card are simple. You could substitute Crushed Curry if you wanted a bolder golden color.
I hope you enjoyed my project! I would love to see what you are making with this bundle! If you don't have it yet, use the Shop Now tab in my sidebar to head over to my store or click on any of the product images below, and get it during Bonus Days! During Bonus Days, for each $50 you purchase, you get $5 to spend in August on anything you choose! So it is the perfect time to treat yourself!

And because I love sharing great deals with friends, I have to let you know the Christmas in July special is almost over!

Would you like over $200 in Stampin' Up! for only $99? Than join my team! This is an amazing deal! In addition to the starter kit, where you choose $125 in product of your choice plus get a month of Paper Pumpkin, you will get the Essentials Gift Pack with $72 in products added to it!! What is this? It is an assortment of stampin' basics, which includes paper snips, a bone folder, SNAIL adhesive, two D acrylic blocks, a pack of grid paper, and a brand new not yet released stamp set from the Holiday catalog, called Carols of Christmas. This is all FREE and in addition to your starter kit, and Stampin' Up! even pays the shipping! This ends on July 31st, so don't let this deal get away, join now!
Thanks for stopping by!