Nov 4, 2019 | 2019 Holiday Catalog, Cards - Christmas & Winter, Designer Series Paper, Dies, Gallery, Stitched Be Mine dies |

Welcome! It's Color Fusers time!

If you have been not here before, I'm glad you have joined us! And if you are a seasoned Color Fusers veteran, welcome back!
It's hard to believe Christmas is right around the corner. In fact, only 49 days to go! Time to start getting those holiday projects done! This month is a traditional holiday color combination with a little somethin' extra – copper! The copper adds some elegance, and really helps pull today's project together.

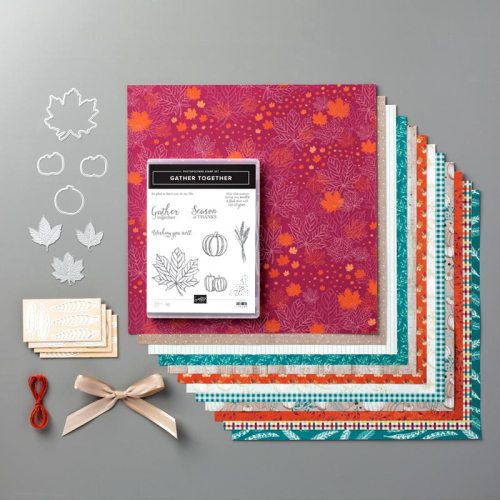
I chose to use the gorgeous Brightly Gleaming designer paper with all things copper – copper metallic elements, copper stars, and copper trim. And my favorite, a layer of copper foil paper to pull it all together!


To create this project:
- cut a Cherry Cobbler card base 8 1/2" x 5 1/5", scored at 4 1/4"
- cut a copper foil layer 4" x 5" and die cut a decorative side edge
- cut a piece of designer paper 4 7/8" x 3 5/8"
- cut a piece of Very Vanilla cardstock 3 7/8" x 1 3/4" for sentiment
I chose the Stitched Be Mine edge die to create a beautiful decorative edge on the copper foil layer, which is layered behind the designer paper and adhered to the card front. Stamp sentiment in Cherry Cobbler ink on Very Vanilla cardstock. Add copper elements and a copper trim bow, than layer onto card front with dimensionals. Embellish with copper stars.
Thanks for stopping by today! If you would like to make today's projects, visit my online store and order your supplies today!
Please continue along the hop and visit Melissa Kerman

Or go back to Barb Mullikin

Use this month's host code for a special thank you gift from me!

Oct 22, 2019 | Annual Catalog, FREE gift with purchase, Stamp sale |

Who doesn't love a great sale?!
I know I sure do!
It's even better with a bonus!
Stampin' Up! is offering a sale on select stamp sets for one day only, Wednesday, October 23rd!
With over 50 sets to choose from, you are sure to find favorites! Now is the time to pull out those wish lists, and check some things off!
Here's a little inspiration:

151372 Buffalo Check background stamp

148779 Tea Together stamp set

147513 Abstract Impressions stamp set
Click here for a complete list of all the stamp sets included in the sale. Or click on any of the images below to see the item details.
As an added bonus, I am offering a FREE set of Holiday Rhinestones with any purchase of at least $50! To get your FREE item, simply shop with me using the October host code. That's it! When I close out the host code at the end of the month, I will send your gift as my thank you for shopping with me!

Shop here now. Sale starts tonight at Midnight MT (2:00am EST)!

Oct 14, 2019 | 2019 Holiday Catalog, Cards - Halloween & Fall, Gallery |

Hello! Thanks for visiting!
Today I am sharing this fun gift holder. I made this as one of the gifts for my Fall Harvest Creative Escape attendees back in September. Inside, I put a collection of Watercolor Pencils. These boxes are quick to create, and can be adjusted easily to fit just about anything.
I shared how to make the same style box in this post.
What a great way to give or receive a gift!
And once again, I have used the Come To Gather product suite, which I just love!
The Gathered Leaves dies in this collection are so versatile, not only do they cut, but they emboss as well! Look at the beautiful detail on this leaf.

I added some gorgeous Golden Glitz Delicata Ink to help bring out the detail even more. The Delicata inks are amazing!! They have been so popular, all 3 colors have sold out! Fortunately, they will be back in stock later this month.
To create this project:
- cut a piece of Cajun Craze cardstock 4" x 10 3/4", score at 1/2" on both long edges and 3" & 3 1/2" on one short edge
- cut a piece of Whisper White cardstock 2" x 1"
Assemble the box. Tie ribbon around box. Punch a starburst from Come To Gather designer paper and layer over a 2 1/4" punched Pretty Peacock cardstock circle. Adhere sentiment to front of circle, than adhere to box front with dimensionals. Die cut a leaf. Add golden glitz ink with a sponge, and adhere to the front of the box.
I hope you enjoyed today's project. Stop back soon to learn how to make a spooky background!

Would you like to do some fall crafting? Get your Come To Gather products by clicking any of the links below, which will take you directly to my store. Use this host code while you are there and earn a thank you gift for your minimum purchase!
Thanks for stopping by!


